Site Preparation and Foundation
Your steel building is only as good as what it sits on. Foundation problems are the most expensive mistakes in steel construction — and almost all of them are preventable. If the anchor bolts are off by half an inch, the building doesn't fit. If the soil wasn't compacted properly, the slab cracks.
This guide covers everything that needs to happen on your site before the first piece of steel goes up.
Start with a site survey
Before any dirt moves, you need to know exactly what you're working with. A site survey establishes property boundaries, existing elevations, utility locations, setback requirements, and easements.
Your surveyor will stake the building corners so the excavation crew knows precisely where to dig. This is not something you eyeball. A building placed two feet too close to a property line means tearing it down or fighting with the zoning board. Neither is fun.
Cost for a basic boundary and staking survey runs $500 to $2,000 depending on lot size and complexity. Money well spent given what's at stake.
Clearing and grading
Most sites need some amount of earthwork before foundation work can begin. This includes:
- Clearing: Removing trees, brush, old structures, debris. Anything in the building footprint goes.
- Stripping topsoil: The organic layer on top of native soil is not suitable for building on. It gets scraped off and stockpiled (or hauled away).
- Rough grading: Shaping the pad area to the correct elevation and slope. The building pad needs to be level, but the surrounding grade should slope away from the building for drainage.
- Compaction: Fill material gets placed in lifts and mechanically compacted to a specified density. Your engineer will specify the compaction percentage — typically 95% Modified Proctor for building pads.
Grading is one of those things that looks simple but gets expensive fast if the site has bad soil, high water tables, or significant elevation changes. A flat, dry site with good native soil is the cheapest scenario. A sloped site with clay soil and drainage issues can double or triple your site prep budget.
Drainage planning
Water is the enemy of every foundation. If water pools around or under your building, you'll eventually get cracking, settling, and erosion. Drainage needs to be addressed during grading — not after the building is up.
The basics: the finished grade should slope away from the building perimeter at a minimum of 1% (one inch per eight feet). Downspouts should discharge into splash blocks or drain lines that carry water away from the foundation. If your site has high water tables or poor-draining soil, you may need French drains or a sump system.
For larger commercial sites, your civil engineer will design a stormwater management plan that satisfies local regulations. This might include detention ponds, underground storage, or permeable paving areas.
Soil testing
A geotechnical report tells your foundation engineer what the soil can support. The testing company drills bore holes at the building corners and midpoints, pulls soil samples, and tests them in a lab. The report specifies:
- Bearing capacity: How many pounds per square foot the soil can support. This determines footing size.
- Soil classification: Sand, clay, silt, rock, or some mix. Each behaves differently under load and when wet.
- Water table depth: If groundwater is within a few feet of your slab, you need waterproofing and possibly a vapor barrier.
- Recommendations: The geotech report often specifies required compaction, fill material type, and any special foundation considerations.
A basic geotech report costs $1,500 to $4,000. Some jurisdictions require it for permit approval. Even if yours doesn't, skipping the soil test is gambling with your foundation. Clay soil that wasn't identified in testing can swell when wet and crack your slab like a cracker.
Foundation types for steel buildings
Steel buildings typically use one of three foundation approaches, depending on soil conditions, building loads, and local practice.
- Spread footings with slab-on-grade: The most common approach. Individual footings are poured beneath each column, connected by a grade beam at the perimeter. A concrete slab is poured between the footings. Footing size depends on column loads and soil bearing capacity — typically 3 to 5 feet square and 12 to 24 inches deep.
- Pier foundations: Used when the bearing soil is deeper than practical for spread footings, or when the site has expansive clay. Drilled piers (also called caissons) reach down to competent soil or rock. More expensive, but sometimes the only option on difficult sites.
- Monolithic slab: The footing and slab are poured as one continuous unit. Common for smaller buildings on good soil. Simpler and faster to construct, but not suitable for heavy column loads or poor soil conditions.
Your foundation engineer designs the system based on the geotech report and the structural loads from the building engineer. These two sets of engineering need to agree with each other. The building engineer specifies the loads coming down through each column. The foundation engineer designs footings to handle those loads in your specific soil.
Anchor bolt placement
This is the step where the most expensive mistakes happen. And they happen more often than you'd think.
Every steel column base plate bolts to anchor bolts embedded in the concrete foundation. The engineered drawings specify the exact location, spacing, and projection of every bolt. We're talking tolerances of plus or minus 1/8 inch. If bolts are misplaced, the column base plates won't line up, and the entire frame is compromised.
Best practices for anchor bolt placement:
- Use bolt templates: Plywood or steel templates that hold the bolts in the correct pattern during the pour. Never freehand anchor bolt placement.
- Double-check before the pour: Measure every bolt group against the engineered drawings. Check dimensions diagonally to verify square. Once concrete sets, moving a bolt means chipping out concrete and redrilling — or worse, redesigning the connection.
- Protect bolt threads: Wrap exposed threads with tape or foam before the pour. Concrete splatter on the threads makes nut installation a nightmare.
- Verify projection: The bolts need to stick out of the concrete the correct distance. Too short and you can't get the nut on. Too long and it interferes with the column splice.
A good concrete contractor who has done steel buildings before knows all of this. If your concrete crew hasn't worked with pre-engineered metal buildings, share the anchor bolt plan with them early and make sure they understand the tolerances. This is not residential concrete work.
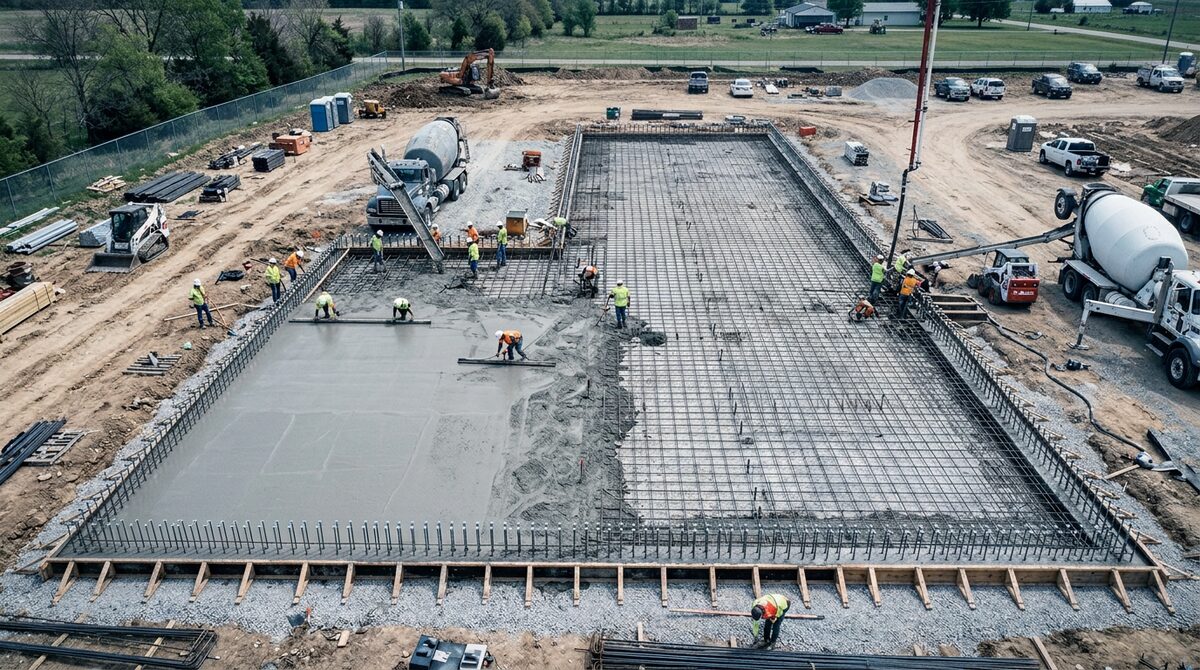
Concrete curing and timing
Fresh concrete needs time to reach design strength before you load it with steel. The standard cure time is 7 days for most foundation work, with full design strength at 28 days. Your erection crew can typically begin setting steel at 7 days as long as the concrete has reached 75% of design strength.
Temperature affects curing. In cold weather (below 40F), concrete cures much slower and may need insulated blankets or heated enclosures. In hot weather (above 90F), concrete can cure too fast and crack if not properly moist-cured. Your concrete contractor should adjust the mix design and curing methods for seasonal conditions.
Utility rough-ins
Any pipes, conduits, or sleeves that need to pass under or through the slab must be placed before the concrete pour. This includes:
- Underground plumbing: Sewer lines, water supply, floor drains.
- Electrical conduit: Underground service entrance, stub-ups for panels and equipment.
- Data and communication: Conduit for network cabling, phone, security systems.
- Gas lines: If the building has gas-fired heating or equipment.
Cutting into a finished slab to add a floor drain you forgot is expensive and ugly. Coordinate with your MEP subcontractors before the pour, not after.
Site access for delivery
Steel buildings arrive on full-size flatbed trucks — 53-foot trailers carrying 40,000+ pounds. Your site needs to accommodate that. Consider:
- Road access: Can a tractor-trailer reach the site? Watch for low bridges, narrow turns, and weight-restricted roads.
- Staging area: You need room to unload and store material adjacent to the building footprint. Plan for at least one full truck length of clear space.
- Crane access: The erection crane needs firm, level ground to operate on. If the only access is across soft fill that hasn't been compacted, the crane can't set up safely.
Coordinate delivery timing with your erection crew. Steel sitting on the ground exposed to weather for weeks isn't ideal. The best scenario is delivery arriving just as the erection crew is ready to start setting steel.
Let us handle the details
Steel Contractors manages excavation, foundation, and erection as bundled scopes — so your anchor bolts match the engineering and your site is ready when the steel arrives. Tell us about your project to get started.
Get Your Free Quote